Home Improvement
How to Install Metal Shed

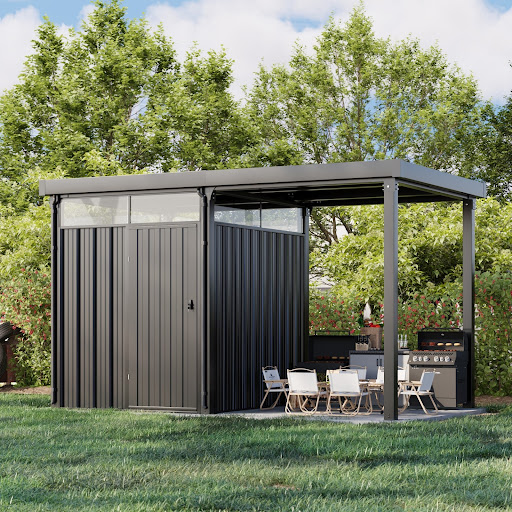
If you’re looking to increase your outdoor storage space, a metal storage shed with floor is a reliable, long-lasting solution. Whether you’re storing garden tools, bikes, lawn equipment, or seasonal items, metal sheds are known for their durability, weather resistance, and sleek design.
At Patiowell, we specialize in creating easy-to-install, high-quality storage shed designed to fit every yard and lifestyle. In this guide, we’ll walk you through the essential steps to properly install your metal shed—ensuring it lasts for years and keeps your belongings safe and dry.
Why Choose a Metal Shed from Patiowell?
Before we dive into the how-to, let’s quickly talk about why metal sheds are a smart choice:
- Durability: Resistant to rust, rot, and pests
- Security: Strong structure offers solid protection
- Low Maintenance: No painting or sealing needed
- Affordability: Great value compared to wood alternatives
At Patiowell, our metal storage sheds with floors come in various sizes and are designed for quick, straightforward assembly. They’re perfect for homeowners who want a blend of performance and simplicity.
What You’ll Need Before Installation
Before you begin, make sure you have the following:
Tools:
- Power drill or screwdriver
- Measuring tape
- Level
- Rubber mallet
- Wrench set
- Safety gloves and goggles
- Ladder
Materials:
- Your Patiowell metal storage shed kit
- Anchoring kit (included with most Patiowell sheds)
- Foundation materials (wood frame, concrete slab, or pavers, depending on your choice)
Step-by-Step Guide to Installing Your Metal Shed
Step 1: Choose the Right Location
Pick a flat, level area that’s easily accessible and free from overhanging trees or power lines. If possible, choose a spot with good drainage to prevent water accumulation.
Pro Tip: Measure the shed footprint and mark it on the ground to make sure everything fits.
Step 2: Prepare the Foundation
A metal storage shed with floor still needs a solid base to sit on. Depending on your shed model, you can use:
- Wood frame: Simple and ideal for small-to-medium sheds
- Concrete slab: Best for heavy-duty or long-term installations
- Patio pavers: A cost-effective, durable solution
Ensure the base is level and square. A stable foundation extends the lifespan of your shed and prevents warping or misalignment.
Step 3: Unpack and Organize the Parts
Lay out all the parts included in your Patiowell storage shed kit. Match them with the parts list in the manual and group them by type (walls, roof panels, fasteners, etc.).
This step prevents confusion later and helps you spot any missing pieces early.
Step 4: Assemble the Shed Frame
Start with the base frame, following the instructions carefully. Use a level to ensure accuracy.
Then, attach the wall panels, usually starting from the corners. Work your way around the structure, tightening bolts as you go.
Tip: Ask a friend to help with lifting and aligning panels—metal panels can be unwieldy on your own.
Step 5: Install the Roof
With the walls secure, install the roof frame and panels. Be sure to:
- Align panels properly to avoid leaks
- Use rubber washers and sealant where recommended
- Attach any included gutter systems or roof vents
This is one of the most crucial steps for waterproofing your shed.
Step 6: Add the Floor (If Not Pre-installed)
If you purchased a metal storage shed with floor, now’s the time to install it. Most floors consist of interlocking steel panels that fit within the base frame. If not included, you can use plywood or other moisture-resistant material cut to size.
Step 7: Anchor the Shed
Anchor your shed to the foundation to prevent movement during strong winds or storms. Use the anchoring system provided in your Patiowell shed kit, which may include ground anchors, bolts, or brackets depending on your chosen base.
Step 8: Final Touches
Install doors, locks, and any interior shelving or storage systems you plan to use. Do a full check to ensure all screws are tight, the structure is level, and the doors open and close smoothly.
Maintenance Tips for Your Metal Shed
- Clean regularly with a mild soap and water to prevent buildup of dirt and debris
- Inspect seals around the roof and walls annually to catch early signs of wear
- Lubricate door hinges occasionally for smooth operation
- Organize your tools with wall hooks or freestanding shelves to maximize space
Why Homeowners Trust Patiowell
At Patiowell, we’ve been helping homeowners build smarter outdoor storage since 2015. Our metal sheds are designed with ease, durability, and customer satisfaction in mind.
When you choose Patiowell, you get:
- Pre-drilled parts for easier assembly
- Clear, step-by-step instructions
- Reliable customer support
- Stylish and functional design options
- A product that goes beyond storage—it transforms your space
Conclusion
Installing a metal storage shed with floor doesn’t have to be a complicated project. With the right tools, a solid plan, and a quality shed from Patiowell, you’ll have a secure and efficient storage shed up in no time.
Whether you’re storing tools, bikes, or backyard essentials, a well-installed metal shed is a long-term investment that adds value and organization to your outdoor space.
Ready to build your shed?
Explore our full line of metal storage sheds at Patiowell.com and start your next backyard upgrade today.
